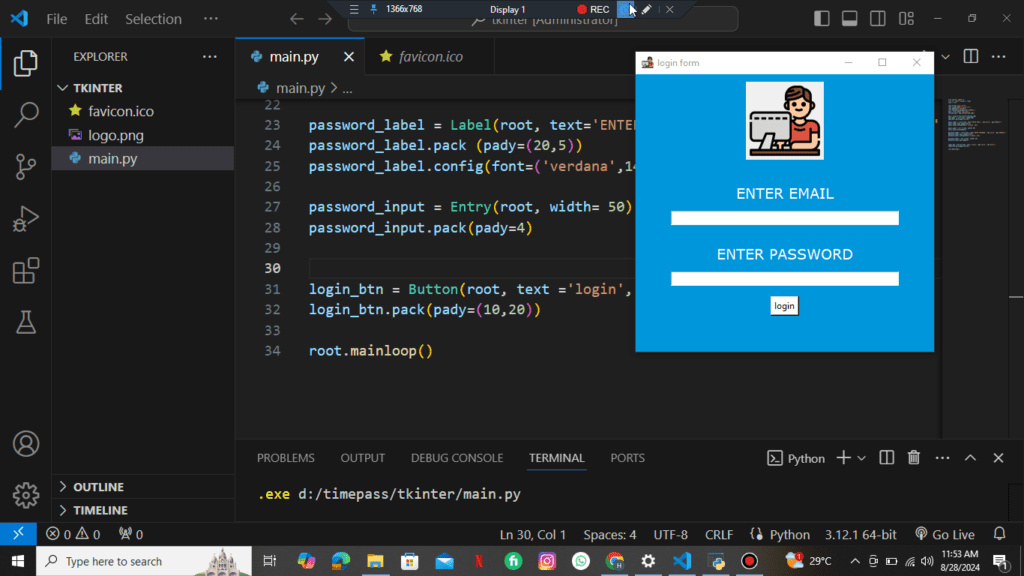
If you’re starting out with GUI programming in Python, Tkinter is a great tool to begin with. In this article, we’ll guide you through creating a simple login form using Tkinter, drawing from a code example by developerhaseeb.
Table of Contents
ToggleStep by step guide
Setup: First, ensure you have Tkinter and Pillow installed. Pillow is needed for image handling:
pip install pillow
Initialize the Window: Start by creating the main application window with Tkinter:
					from tkinter import *
from PIL import ImageTk, Image
root = Tk()
root.title('Login Form')
root.iconbitmap('favicon.ico')
root.geometry('350x500')
root.configure(background='#0096dc')
Add an Image: Load and resize an image to use in your login form:
					img = Image.open('logo.png')
resized_img = img.resize((100,100))
img = ImageTk.PhotoImage(resized_img)
Img_label = Label(root, image=img)
Img_label.pack(pady=(10,10))
Create Input Fields: Add labels and entry fields for email and password:
					email_label = Label(root, text='ENTER EMAIL', fg='white', bg='#0096dc')
email_label.pack(pady=(20,5))
email_label.config(font=('verdana',14))
email_input = Entry(root, width=50)
email_input.pack(pady=4)

password_label = Label(root, text='ENTER PASSWORD', fg='white', bg='#0096dc')
password_label.pack(pady=(20,5))
password_label.config(font=('verdana',14))
password_input = Entry(root, width=50, show='*')
password_input.pack(pady=4)
Add a Login Button: Create a button for user interaction:
					login_btn = Button(root, text='Login', bg='white', fg='black')
login_btn.pack(pady=(10,20))
Run the Application: Start the Tkinter event loop to make your GUI responsive:
root.mainloop()
Customization
You can personalize the form by adjusting colors, fonts, and sizes according to your preferences. Adding functionality to the login button or enhancing form validation can further improve the usability of your form.


