When it comes to establishing a strong online presence, choosing the right web hosting plan is crucial. Hostinger offers a diverse range of web hosting plans designed to cater to various user requirements. Whether you’re launching your first website or migrating from another provider, finding the perfect fit for your website is essential.
Hostinger’s web hosting services promise a seamless user experience, backed by reliable performance, robust security, and exceptional support. The process of purchasing a hosting plan is straightforward, involving just four simple steps. Additionally, comprehensive resources are available to guide users through getting started and maximizing the services offered. Exploring Hostinger’s web hosting plans can help individuals discover the benefits of partnering with this provider for their online success.
Why Buy Hosting From Hostinger
When shopping for a reliable web hosting provider, there are several key factors to consider. Server reliability, security, add-on features, and customer support are all crucial elements that can make or break your online presence. Hostinger, a popular web hosting option, appears to tick all the right boxes.

With Hostinger, users can expect:
- Around-the-clock support from a multilingual team, available via live chat
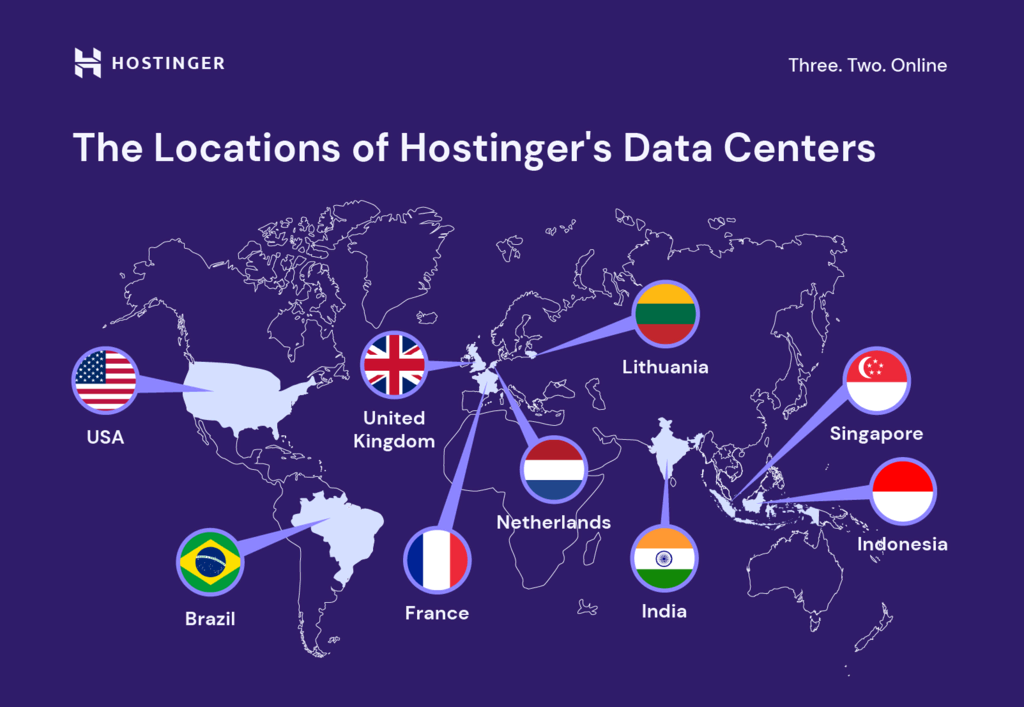
- High-performance capabilities thanks to multiple global data centers and LiteSpeed web servers
- A 99.9% uptime guarantee, backed by durable SSD storage
- A range of free benefits, including a domain, custom email, AI-powered website builder, and website migration, with most plans
- A 30-day money-back guarantee, applicable to all hosting plans
On paper, Hostinger seems to offer a compelling package for those seeking a trustworthy web hosting provider. But how does it stack up in practice?
How to Buy Hosting From Hostinger in 4 Steps
There are various hosting plans to choose from, depending on your goals and the purpose of your website. A portfolio website, for example, needs resources different than an online store.
Choose Your Hosting Plan
Select the perfect plan that fits your website’s needs. Hostinger offers a range of plans, from single websites to business solutions, so pick the one that suits you best.
Select the Hosting Period
Decide on the length of your hosting period. Hostinger offers flexible options, from monthly to multi-year plans. Choose the one that works best for you.
Enter Account Information
Fill in your account details, including your name, email address, and password. This will help you manage your hosting account and access support when needed.
Make the Payment
Complete your purchase by paying for your chosen plan. Hostinger accepts various payment methods, making it easy to secure your hosting spot.
What to Do After You Buy Hosting From Hostinger
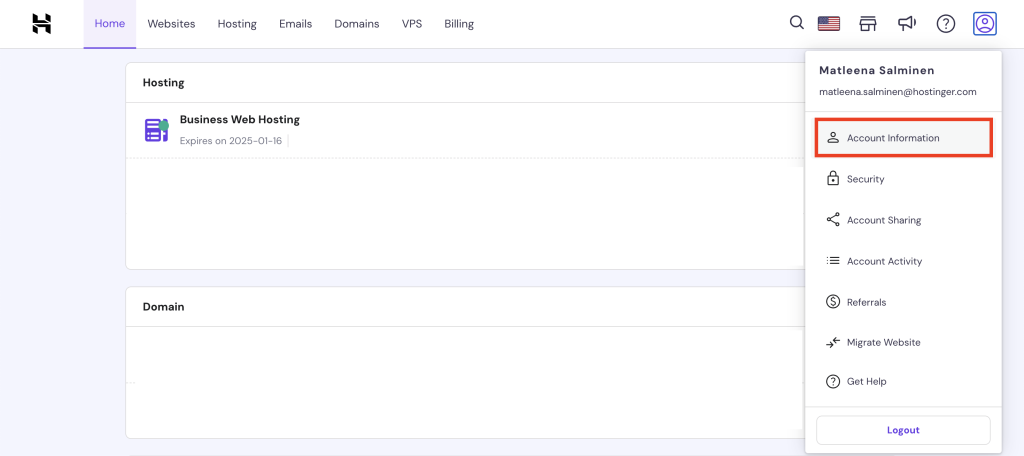
After purchasing your hosting plan from Hostinger, it’s time to configure your account. To do so, log in to hPanel, Hostinger’s intuitive control panel, and click on the profile icon in the top right corner of your screen. From there, select “Account Information” and fill in your account details, including your phone number, company profile (if applicable), and any additional information that needs to be shown on invoices.

You can also take this opportunity to enhance your account security by enabling two-factor authentication (2FA) and setting up account sharing if needed. By completing these steps, you’ll have your Hostinger account set up and ready to go, making it easy to manage your hosting services, access support, and ensure your account is secure.
Conclusion
Hostinger offers high-performance web hosting plans starting at just $1.99/month, providing exceptional value for money. Each plan comes with a free domain for the first year, free business email, unlimited bandwidth, 24/7 customer support, and a range of AI tools. To get started, follow these four simple steps:
First, choose your hosting plan from our range of options, including web, cloud, VPS, and Managed WordPress hosting. Select the plan that best fits your website’s needs and budget.
Next, select your hosting period, with options ranging from 1 to 48 months. The longer your hosting period, the lower your monthly fee will be.
Then, enter your account information, either logging in to your existing account or creating a new one with your email address.
Finally, make your payment using your preferred method and submit the required information.
After purchasing your plan, log in to hPanel and configure your account settings. You can then migrate your existing website to Hostinger or create a new one, taking advantage of our intuitive tools and expert support.
